


williamtdr
New member
- Joined
- May 22, 2024
- Messages
- 3
More photos here.
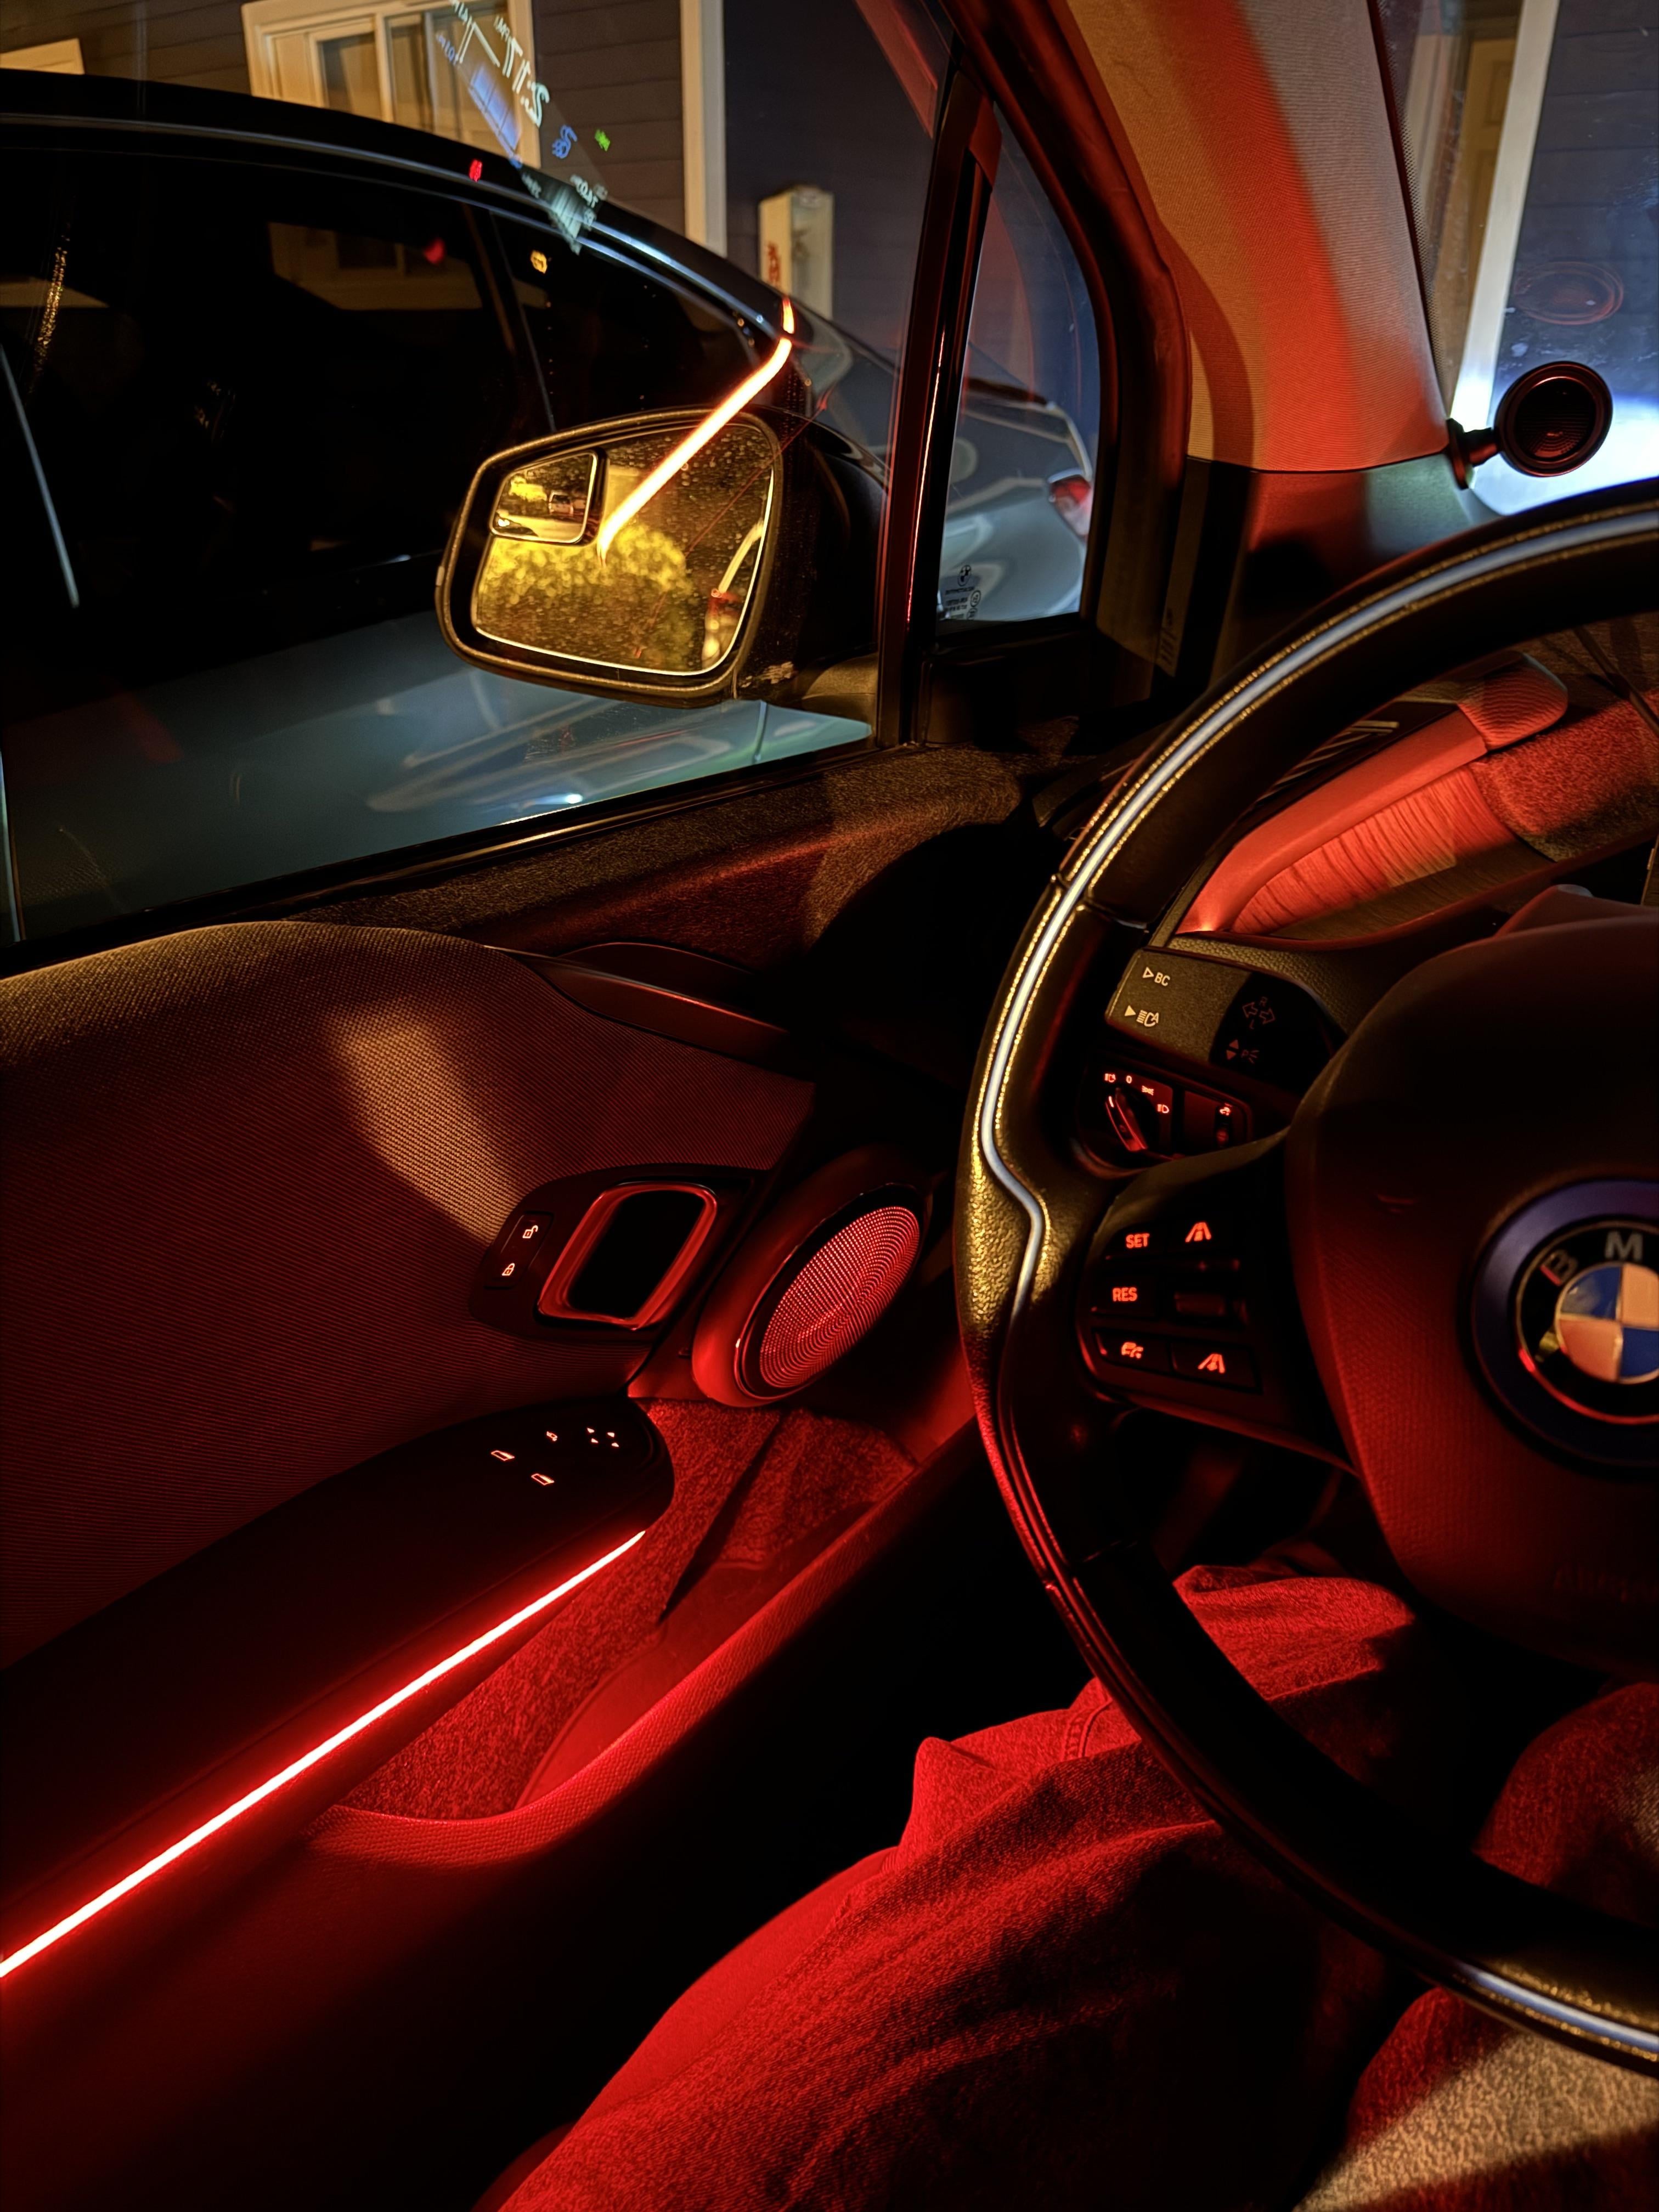
Still putting the finishing touches on this installation, but wanted to show off an ambient lighting setup that I recently installed. The base car’s interior is a bit dark at night, and this helps fill in some of the visual space. A lot of trim panels are still off, as my passenger mirror dropped off the LIN bus when I did this - need to correct that before reassembly.
- this is a VERY DIFFICULT installation! I’m very comfortable taking this car apart and putting it back together again, but this is still very advanced and took a few dedicated days.
- you need to run new wires into the door to do this installation properly, and fully disassemble the lower dash / inner door cards etc
- at the end of the installation, you’ll have lights that can be controlled via the iDrive lighting settings (the color mapping is wrong by default, but one may be able to correct that), or a mobile app via bluetooth (you scan a wechat code and it does everything from there)
- I still need to finish lighting around the center console and glovebox - broke a few pieces when assembling this, ended up ordering a spare set of lights.
Kit I used on Aliexpress ($105): https://www.aliexpress.com/item/1005003823252435.html
I used this as a rough guide, but it’s missing quite a few steps: https://f30.bimmerpost.com/forums/showthread.php?t=1954913
All of the lightstrips are made up of individual LEDs, and the pin out is gnd (orange), red, green, blue. They can be cut, but don’t particularly like being bent - you can eventually get an intuition for where the LED is and where one can flex without breaking, but making bends gradual is good.
Start by removing the iDrive controller - just pull up on the trim around that area. The kit comes with a light box that will splice into the 4 pin connection going into this controller, and use it to power the lights. The dip switch configuration is on the back, allowing you to set between configuring in iDrive (see original post for required coding options), using the 5-8 buttons on the NBT to set brightness and color, and configuring purely through their app - one can translate the label for those configurations.
One can test fit lights by plugging them into the controller. The splitter configuration they give you is a bit strange, and may not be sufficient depending on how you wire it - I had to make a few cables for this project. Note that the 4 different lighting outputs on the controller have lables (e.g. center console, footwell) - this will eventually correlate to one of two lighting “zones” in the app, but it’s not very intuitive (I think everything except center console is controlled in one zone, so I ended up seperating out the footwell lamps so I could have those brighter). You can experiment with that wiring at the end.
Start by removing the kick panel covers, kick panels, lower dash and midbass speakers. Run cabling up through the dashboard for any center console lights / dashboard trim. I elected to press fit the light tube you see around the instrument cluster, carefully wedging with a trim tool into the existing gap. The center console flat strip requires an especially careful hand - do not bend this one too sharply. The interface for the NBT should pull straight out with a good tug towards the center of the car, and the center console lights can be routed around its edge (attaching with double sided / butyl tape or similar). The footwell lamps just clip into existing holes in the power distribution box plastic panel and driver footwell panel.
The door wiring is by far the hardest part. One can follow a Youtube video by bavsound for a good example on how to take off the inner door card, if you’re not already familiar (I’ve done a lot of audio work on this car, so that part is second nature). For the door connector leading into the frame, I used a spanner tool like what you’d use to adjust a suspension fork - something with a little hook on the end, because you need to be able to pry up the top of the plug from both sides. Since one of them is towards the frame of the car, it can be a bit tricky to access - but with a spanner you can pull up on that side.
Once you get the plug all the way up and separated, one can push the car side of the connector in by pressing down on the top (there’s a clip). The door wiring cable routes behind the midbass speaker on both sides. For the door side, to expose the connector - remove the rubber tube by wedging a flathead screwdriver or trim removal tool, this will get access to the wires. To release the 40 pin molex connector, there’s a hidden tab behind the rubber tube, towards where the connector is on the rim - one can pry this up with a flathead while pulling the connector out, that will free it. Finally, to release the inside pieces so you can route new cables, there’s a place at the back of the connector where you’ll have to wedge a flathead and dislodge the two sets of pins (otherwise plastic pieces that are part of these “guards” will prevent you from inserting new wires).
My base car had a connector and wiring for ambient lighting already in the doors (z10 gnd, 58_ambl_1 routed to pin 16 on the door connector, and 58_ambl_2 routed to pin 15), but it wasn’t actually wired to the right pins on the BDC - in fact, you’ll see when you open the connectors, that there’s nothing on those pins. I routed the blue and green channels into those pins (15 and 16), and connected the corresponding channels of the door lights. You’ll need two more pins for ground and the last color - one can’t reuse the existing ground pin (pin 27 to ground Z10), I’m assuming it’s because the lights are too sensitive or the iDrive controller is on a different groundplane.
That’s it - to finish off the installation, the kit includes a hole saw bit with the right diameter to drill the door pocket light, and I illuminated the speakers with the supplied handle lights. Thanks for reading!